

Avoid Soggy Bammy: 4 Steps Every U.S. Home Cook Must Nail
TOJEXPRESS.COM-Antonio HenryTo cook bammy at home, seal a well-drained cassava disc on a hot griddle until it holds together, soak it in coconut milk for about 10 minutes, then finish by frying, baking, or air-frying until golden. The step that makes or breaks the whole process happens before any heat touches the pan: squeezing every drop of liquid out of the grated cassava. Skip that, and no amount of coconut milk saves a soggy disc. From there, finishing takes anywhere from 4 to 20 minutes depending on your method.
TL;DR:
- Properly squeezing out excess moisture from grated cassava is crucial; failure to do this results in soggy bammy discs that fall apart during cooking.
- Using full-fat canned coconut milk for soaking enhances the traditional tropical richness and prevents the discs from becoming too dry or dense.
- Achieving a consistent thickness with a ring mold and controlling the heat prevents uneven cooking, burning, or raw centers.
- Freezing par-cooked discs allows for quick assembly and frying later, making bammy more convenient for regular home preparation.
- Rushing the squeeze step or soaking too long before frying leads to soggy or crumbly bammy, so attention to moisture control and timing is essential.
Table of Contents
- What Is Bammy and Why Does the Prep Matter So Much?
- Ingredients and Quick Substitutions for Bammy
- Tools and Prep: Peeling, Grating, and Squeezing Cassava
- Forming and Sealing Bammy Discs
- Soak in Coconut Milk, Then Choose Your Finish
- Storage, Freezing, and Reheating Best Practices
- Traditional and Modern Serving Ideas
- Common Bammy Problems and How to Fix Them
- Where to Find Reliable Bammy Ingredients
- Why Most Bammy Recipes Skip the Part That Actually Matters
- Sources
What Is Bammy and Why Does the Prep Matter So Much?
Bammy is a traditional Jamaican flatbread made from grated cassava (also called yuca), pressed into a disc and cooked on a hot griddle or skillet. It’s naturally gluten-free and vegan, since the only binding agent is the starch already inside the root. That’s exactly why the prep work carries so much weight. Wheat bread has gluten to hold it together when things go wrong. Bammy has nothing but the cassava’s own starch, so the moisture balance in the pulp determines whether your disc turns into a sturdy, chewy round or a pile of crumbs.
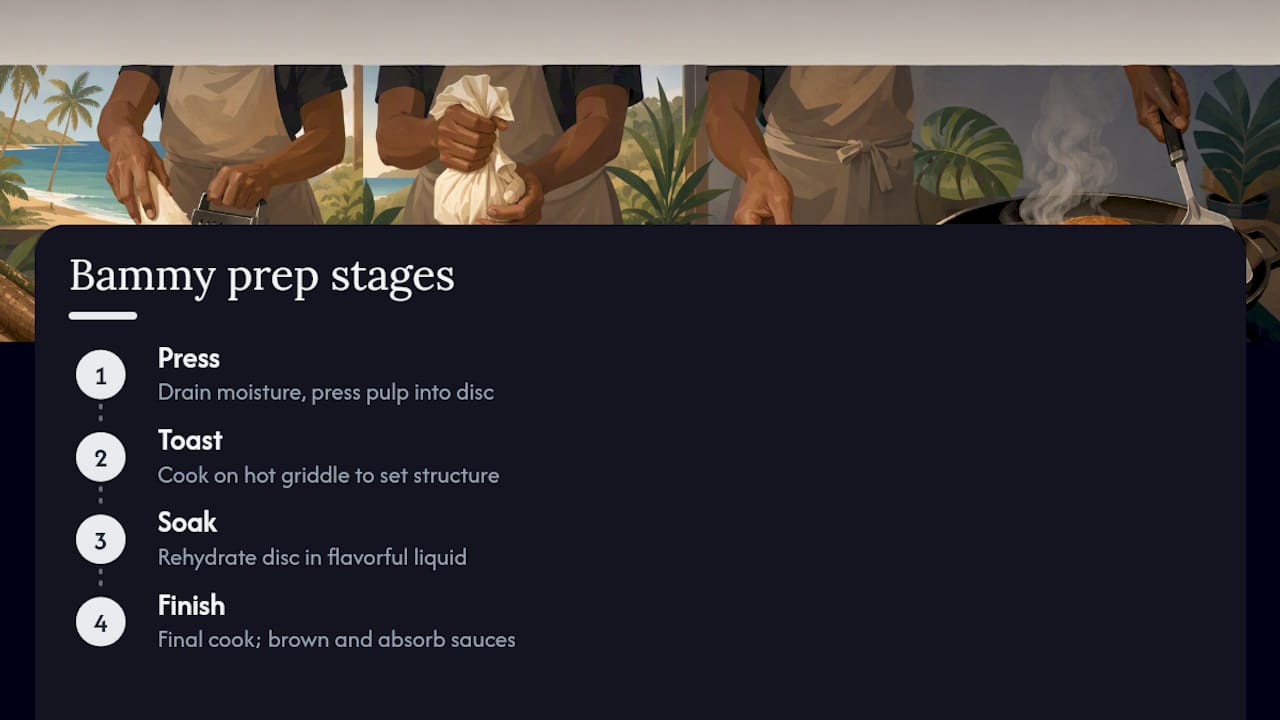
The classic four-stage rhythm behind bammy is press, toast, soak, finish, and it hasn’t changed much since cooks historically drained grated cassava with a press bag and heavy stones before baking it on a griddle(https://en.wikipedia.org/wiki/Bammy). Modern kitchens have swapped the stones for cheesecloth and a mixing bowl, but the logic is identical: dry the pulp, seal it into shape, then rehydrate it with something flavorful before the final cook. It’s commonly served alongside escovitch fish or ackee and saltfish, which tells you a lot about its job on the plate. It’s a starch built to soak up sauce, not compete with it.
Ingredients and Quick Substitutions for Bammy
A piece of fresh cassava yields several discs, depending on how thick you shape them. Here’s what a small home batch actually calls for:
- Fresh cassava (yuca): about 2 pounds, peeled
- Salt: 1 to 1½ teaspoons, mixed into the pulp before shaping
- Full-fat canned coconut milk: 1 to 2 cups for soaking, since the fat content is what gives bammy its traditional slightly sweet, tropical richness
- Oil or butter: neutral oil for frying, or butter for a richer finish on a griddle
If fresh cassava isn’t in your kitchen, cassava flour is sometimes used as a shortcut, though the texture will be different from traditional bammy. Store-bought frozen bammy rounds are another practical option. Just skip straight to the soak-and-finish stage and save yourself the prep altogether. For the coconut milk, reach for a canned, full-fat version rather than a “lite” carton, since watery coconut milk won’t carry the same flavor into the disc.
Tools and Prep: Peeling, Grating, and Squeezing Cassava
Start by cutting the cassava into manageable 3 to 4 inch sections, then slice through the thick, waxy skin lengthwise and peel it away along with the pinkish layer just underneath. That pink layer carries a bitter edge you don’t want in the final bread, so don’t stop peeling until you hit the pure white flesh.
- Cut the peeled cassava into chunks small enough to feed through a box grater or food processor.
- Grate on the medium setting. A food processor’s shredding attachment moves faster, but a box grater gives you more control if the root is fibrous.
- Transfer the shredded pulp to cheesecloth or a nut milk bag and twist hard, wringing out the starchy liquid over a bowl or sink. This is the step people rush, and it’s the one that decides everything downstream.
- Check the texture. Squeezed pulp should feel like damp sand, not wet dough and not chalky dust.
Pro Tip: If the pulp feels powdery and refuses to hold together after squeezing, work in water a tablespoon at a time, up to about 1/4 cup per batch, kneading briefly between additions. Add too much at once and you’ll undo all that squeezing.
Keep a cast iron skillet or heavy griddle on hand for the toasting stage, along with an adjustable cake ring or ring mold to keep your discs uniform. A scrap of muslin or leftover cheesecloth from the squeezing step works fine for lining the mold if the pulp sticks.
Forming and Sealing Bammy Discs
Once your pulp is squeezed and seasoned with salt, portion it into rounds roughly ½ to 1 inch thick. Thinner discs cook faster and crisp up more; thicker ones give you a denser, chewier center closer to what you’d get from a Jamaican market stall. Pack the pulp into your ring mold firmly, pressing out air pockets as you go, then lift the mold straight up to release the shaped disc onto a lightly oiled griddle.
The toasting stage is where the disc actually becomes bread instead of a pile of shredded root. Heat your skillet to medium, add a light coating of oil, and set the disc down without disturbing it.
- Toast for about 4 to 5 minutes per side over medium heat.
- Watch for the edges to turn opaque and slightly golden. That’s your visual cue the starch has set.
- Resist flipping too early. If the disc still looks wet and translucent on top, it needs more time before it will hold together.
- Use a wide spatula to flip in one confident motion. A hesitant, partial flip is what causes cracks down the middle.
Once both sides are sealed and lightly toasted, remove the ring mold if you haven’t already and let the disc rest on a plate for a minute before handling it further. This is your par-cooked bammy, and it’s the natural stopping point if you’re making a batch ahead of time.
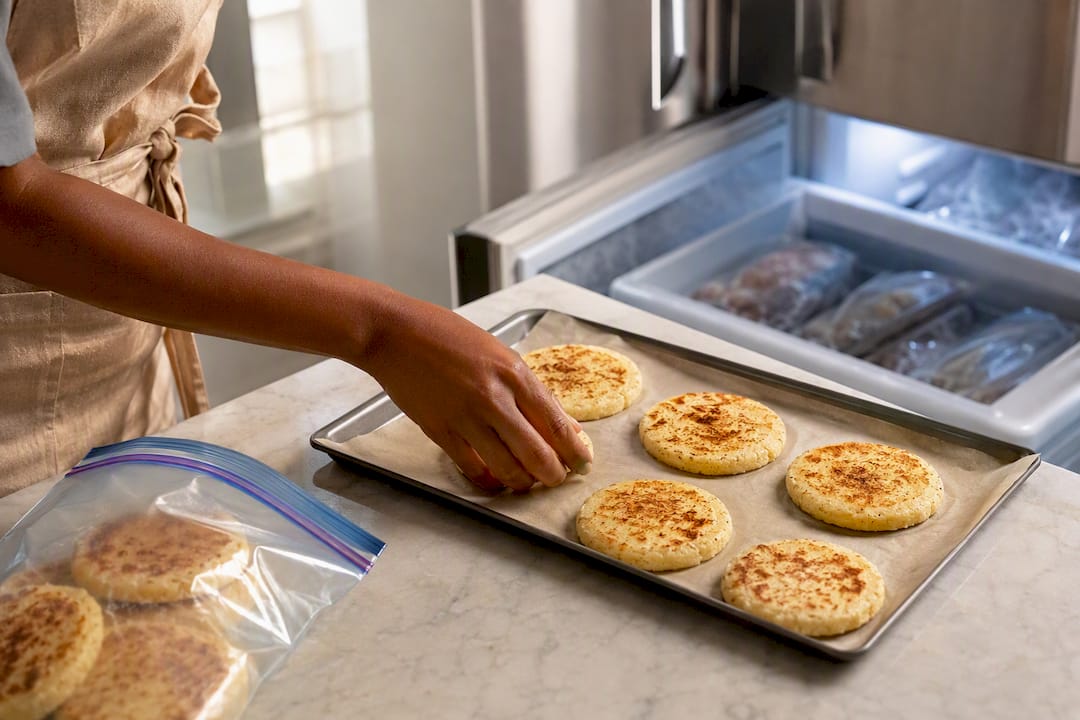
If you’re not soaking and finishing right away, this is exactly the stage to freeze. Sealed, par-cooked discs freeze well, and pulling one straight from the freezer to soak and fry later is a legitimate shortcut, not a compromise. Lay the toasted discs flat on a tray until solid, then transfer them to a freezer bag so they don’t stick together.
Soak in Coconut Milk, Then Choose Your Finish
The coconut milk soak isn’t decoration. It rehydrates the sealed disc from the outside in, softening the toasted crust while the fat in full-fat coconut milk works its way into the starch, which is why a roughly 10 minute soak in coconut milk before frying until golden is the standard move. Anywhere from 5 to 15 minutes works, but 10 minutes is the sweet spot most home cooks land on. Soak too briefly and the center stays dense; soak too long and the disc can start to fall apart before it ever hits the pan.
From there, pick your finish based on what’s already on your stove:
- Pan-fry: Heat about ¼ inch of oil to roughly 350°F and fry the soaked disc for 2 to 4 minutes per side until deeply golden and crisp at the edges.
- Bake: Set your oven anywhere from 350°F to 425°F and bake 10 to 20 minutes per side, leaning toward the higher end of that range for thicker discs.
- Air-fry: Air-fry at a moderate temperature for a few minutes per side, checking halfway through since air-fryer baskets vary a lot in how they circulate heat.
- Steam: Steam for about 10 minutes if you want a softer, more pliable texture without any browning, useful when bammy is playing a supporting role next to a sauced main dish.
If you’re finishing a frozen par-cooked disc, give it a shorter 5 minute soak and add a minute or two to whatever fry time you’d use fresh, since the frozen center needs a little extra heat to catch up with the crisped edges.
Storage, Freezing, and Reheating Best Practices
Par-cooked discs hold up fine in the refrigerator for up to 24 hours before you soak and finish them, wrapped tightly so they don’t dry out.
- Freeze par-cooked discs flat on a tray first, then bag them once solid to avoid a stack that fuses together.
- Label bags with the date. Frozen bammy holds its quality for a few months but starts losing texture the longer it sits.
- Fry straight from frozen using the shortened 5 minute soak mentioned above, rather than fully thawing first, which tends to make the disc waterlogged.
- If you do thaw before soaking, pat the disc dry first so it doesn’t dilute your coconut milk.
Traditional and Modern Serving Ideas
Bammy earns its reputation as a plate’s best supporting player. Classic pairings lean heavily on seafood and stewed vegetables:
- Fried or escovitch fish, where the tangy pickled peppers cut through bammy’s richness
- Ackee and saltfish for a breakfast or brunch spread
- Callaloo for a vegetarian pairing that still feels traditional
- Simple steamed vegetables or a mild curry for a lighter, plant-based plate
Cut finished bammy into quarters or wedges rather than serving the whole disc. One full disc easily covers two servings when it’s a side rather than the main event. A squeeze of lime or a scotch bonnet pepper sauce on the side rounds it out without overpowering the coconut milk flavor underneath. For more pairing ideas beyond the obvious ones, browse Caribbean side dishes that hold up well next to a starchy, mild base like this.
Common Bammy Problems and How to Fix Them
Most bammy failures trace back to one of three things: uneven shaping, pulp that’s too dry or too wet, or rushing the toast stage.
- Crumbly discs that fall apart when you flip them usually mean the pulp was too dry going in. Work in water a tablespoon at a time until the mixture holds when pressed.
- Burnt edges with a raw center point to heat that’s too high or a disc that’s uneven in thickness. A ring mold solves this by forcing every disc to the same size, which means the whole thing cooks at the same rate instead of the thin edges scorching while the middle lags behind.
- A soggy center after frying almost always comes from skipping or rushing the squeeze step, or from soaking a par-cooked disc too long in coconut milk before frying.
Pro Tip: If you froze your discs and they turn out soggy on reheating, you likely thawed them fully first. Go straight from frozen with the short 5 minute soak instead. Skipping the thaw keeps the crust from turning to mush.
Where to Find Reliable Bammy Ingredients
Antonio covers Caribbean cooking for readers looking to recreate dishes like bammy accurately at home, with a focus on ingredient sourcing that matches what you’d find in Jamaica itself. Full-fat coconut milk makes the biggest difference in the soak stage, and Tojexpress carries a dairy-free version built for exactly this kind of cooking. If fresh cassava isn’t available near you, cassava flour is a workable substitute, and a rundown of cassava flour recipes covers how the technique shifts. For a broader sense of how bammy fits into Jamaican food culture beyond the recipe itself, this essay on Jamaican identity and tradition is worth a read.
Why Most Bammy Recipes Skip the Part That Actually Matters
Most bammy instructions treat the squeeze step as a footnote, one line buried between grating and shaping, when it’s actually the single variable that determines whether your disc survives the pan. I’d argue the entire recipe should be read backward from that step. Everything else, the ring mold, the coconut milk soak, the finish method, is forgiving. A slightly uneven fry time won’t ruin dinner. Pulp that’s still wet when you shape it will.
The conventional advice also underrates freezing par-cooked discs as a real strategy rather than a compromise. For home cooks in the U.S. who can’t count on finding fresh cassava every week, building a small stash of toasted, unsoaked discs in the freezer turns bammy from an occasional project into something you can pull out on a Tuesday. Prioritize getting the pulp hydration right once, batch the toasting stage, and the soak-and-finish part becomes almost effortless every time after.
— ANTONIO
Sources
- Jamaican Bammies (Cassava Bread) – The Spruce Eats
- Bammy recipe: A taste of Jamaica’s cassava heritage | Breadfruitonline
- Bammy
- Jamaican Bammy Recipe — That Girl Cooks Healthy